.png)
View Presets are defined in Custom Metadata Types and help you to customize the look-and-feel of the dataset.
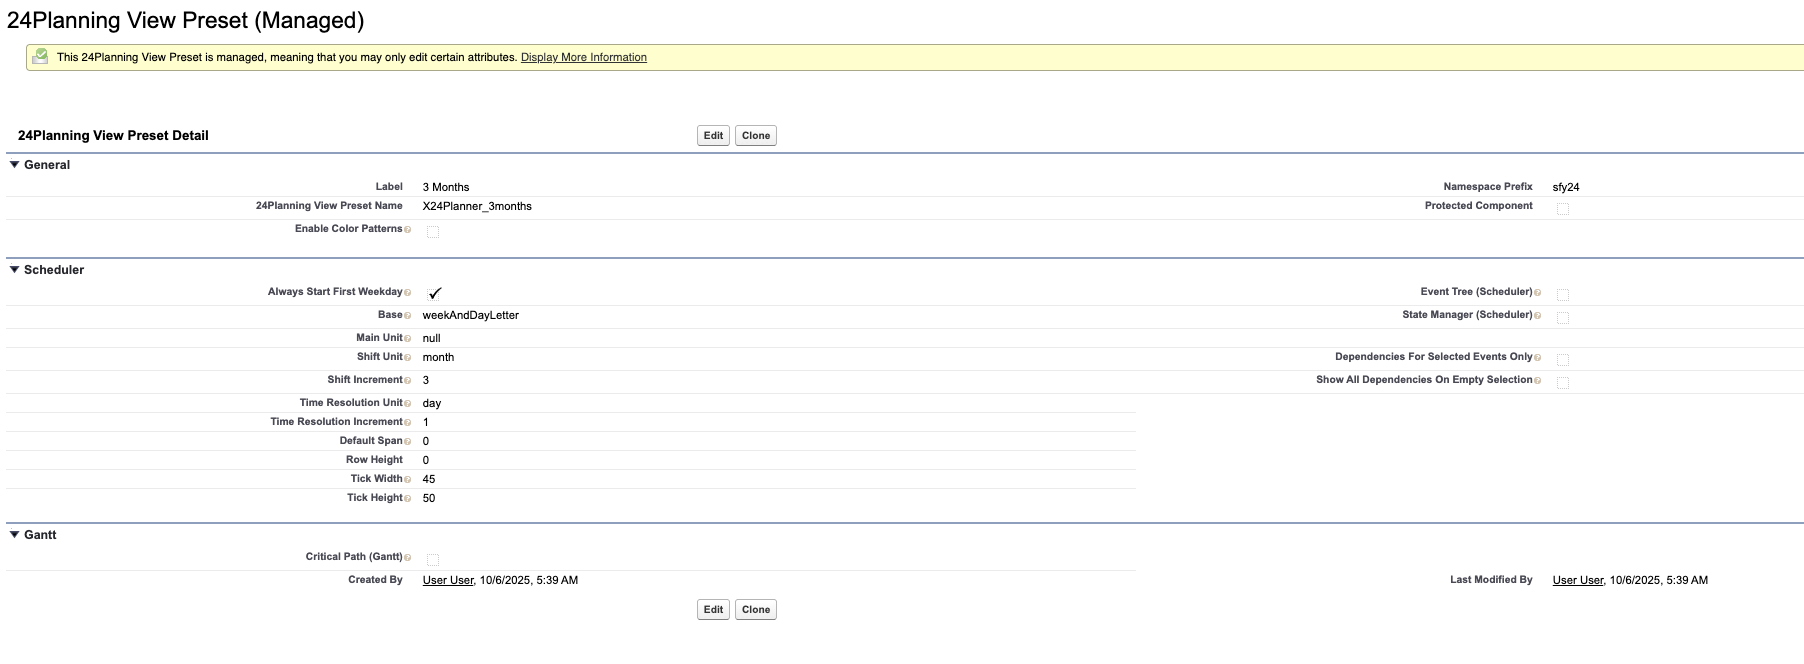
Some of the settings are applicable to resource scheduling and Gantt while others are specific to either of these, as shown in the example below. It is also possible to create your own custom view preset to further optimize the user experience.
Navigate to Setup > Custom Metadata Types. Click on Manage Records next to the 24Planning_View_Preset.
General Settings
-
Enable Color Patterns: Every color has attached to it a pattern that aids with the visual distinction between events. This option can be switched on/off. The specific color pattern that applies to a certain color is defined in the 24Planning Color Customer Metadata Type.
Scheduler Settings
These are the settings that are specific to the Resource Scheduling:
-
Tick Width: the time column width in the planning board.
-
Base: determines the visual representation of hours / days / weeks & months at the top of the planning board (note that the spelling is case-sensitive)
-
hourAndDay:

-
minuteAndHour:

-
weekAndDayLetter: 2 levels with week at the top and name of the day:

-
dayAndWeek: 2 levels with week at the top and day:

-
weekAndDay: 2 levels with week at the top and day:

-
weekAndMonth: 2 levels with weeks and month:

-
monthAndYear:

-
year:

-
-
Shift Unit: the unit by which the time window shifts when clicking the forward/back arrows in 24Planning. This can e.g. be hour, day, week, etc. See the tooltip for all options.
-
Shift Increment: The number of Shift Units to shift when clicking the forward/back arrows.
As an example, when the Shift Unit is day and the Shift Increment is 2, then 2 days will be shown in the planning board and you will shift by two days when clicking the forward/back arrows.
Pro Tip: If your working week runs from Monday to Friday and you only want to see those 5 working days in the Week view, then set the Shift Increment for the Week Preset to 5.
-
Time Resolution Unit: This will determine the granularity with which you can plan, if e.g. set to ‘minute’ and the Time Resolution Increment is set to 10, you can reschedule events with a granularity of 10 minutes.
-
Time Resolution Increment: The number of Time Resolution Units that will be taken into account when shifting an event, as explained above.
It is recommended to set the time resolution unit & increment to at least 1 minute.
It is recommended not to increase the Tick Width too much as you will require a lot of scrolling on the planning board.
When you create a new View Preset in the custom metadata types, these will not be immediately visible in the dataset configuration. You need to complete the following steps:
Navigate to Setup > Object Manager > Dataset object -> Fields & Relationships
-
Modify field: Default View Presets
-
You need to add your new View Preset to the picklist of View Presets.
-
-
Modify field: Available View Presets
-
You need to add your new View Preset to the picklist of View Presets.
-
-
Event Tree: Synchronized movement of events based on the defined hierarchy.
-
State Manager: Activates the Save, undo, redo for the resource based view. When unchecked, all changes are immediately saved in the resource based view.
-
Dependencies for Selected Events only: Show only the dependencies for the selected events.
-
Show All Dependencies on Empty Selection: Determines the behaviour when no events are selected.
-
Header Format: Allows you to override the standard base configuration. The format is {
w.}W MM YYYY, where the text between the curly braces is a fixed text string. So in case you want to show only the weeks in the header, you can use the header format {w.}W.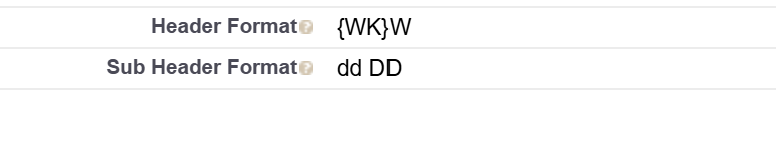
-
Sub Header Format: Example DD
The following formats are available:
|
Unit |
Token |
Description |
|---|---|---|
|
Year |
YYYY |
4-digits year, like: 2018 |
|
Year |
Y |
numeric, any number of digits |
|
Month |
MM |
01 - 12 |
|
Month |
MMM |
Short name of the month |
|
Date |
DD, D |
01 - 31 |
|
Date |
dd |
Mon, Tue, … |
|
Hour |
HH, hh, h |
00 - 23 or 1 - 12 |
|
Minute |
mm, m |
00 - 59 |
|
Second |
ss, s |
00 - 59 |
|
AM/PM |
A |
AM or PM |
|
|
a |
am or pm |
|
TimeZone |
Z |
Z for UTC or +-HH:mm. Local timezone if left out |
Gantt Settings
-
Critical Path: show critical path in the Gantt chart.
Creating Your Own View Preset