.png)
Once you have successfully configured 24Planning according to the previous steps, your planner is ready to start using the planning board as shown in the example below:
For a quick overview of the capabilities of the planning board, please have a look at this video;
Top-level menu
The top level menu allows you to:
-
Arrows < and >: Shift the time window that is displayed on the planning board.
-
TODAY: The TODAY button allows you to show the preset time window that contains the current date. E.g. if it is september 01 and the PRESET is one week, the planning board will show the first week of september.
-
DATE: Pick a date for which you want to show the planning in the planning pane.
-
DATASET: Change the dataset that is displayed in the planning view.
-
PIN: Allows you to pin a particular dataset such that when you open the 24Planning board, the pinned dataset will show up. The pin is user-speficic.
-
PRESET: Change the duration of the time window displayed via the PRESET dropdown.
-
REFRESH: Pressing this button will refresh the events and dependencies (but not the resources).
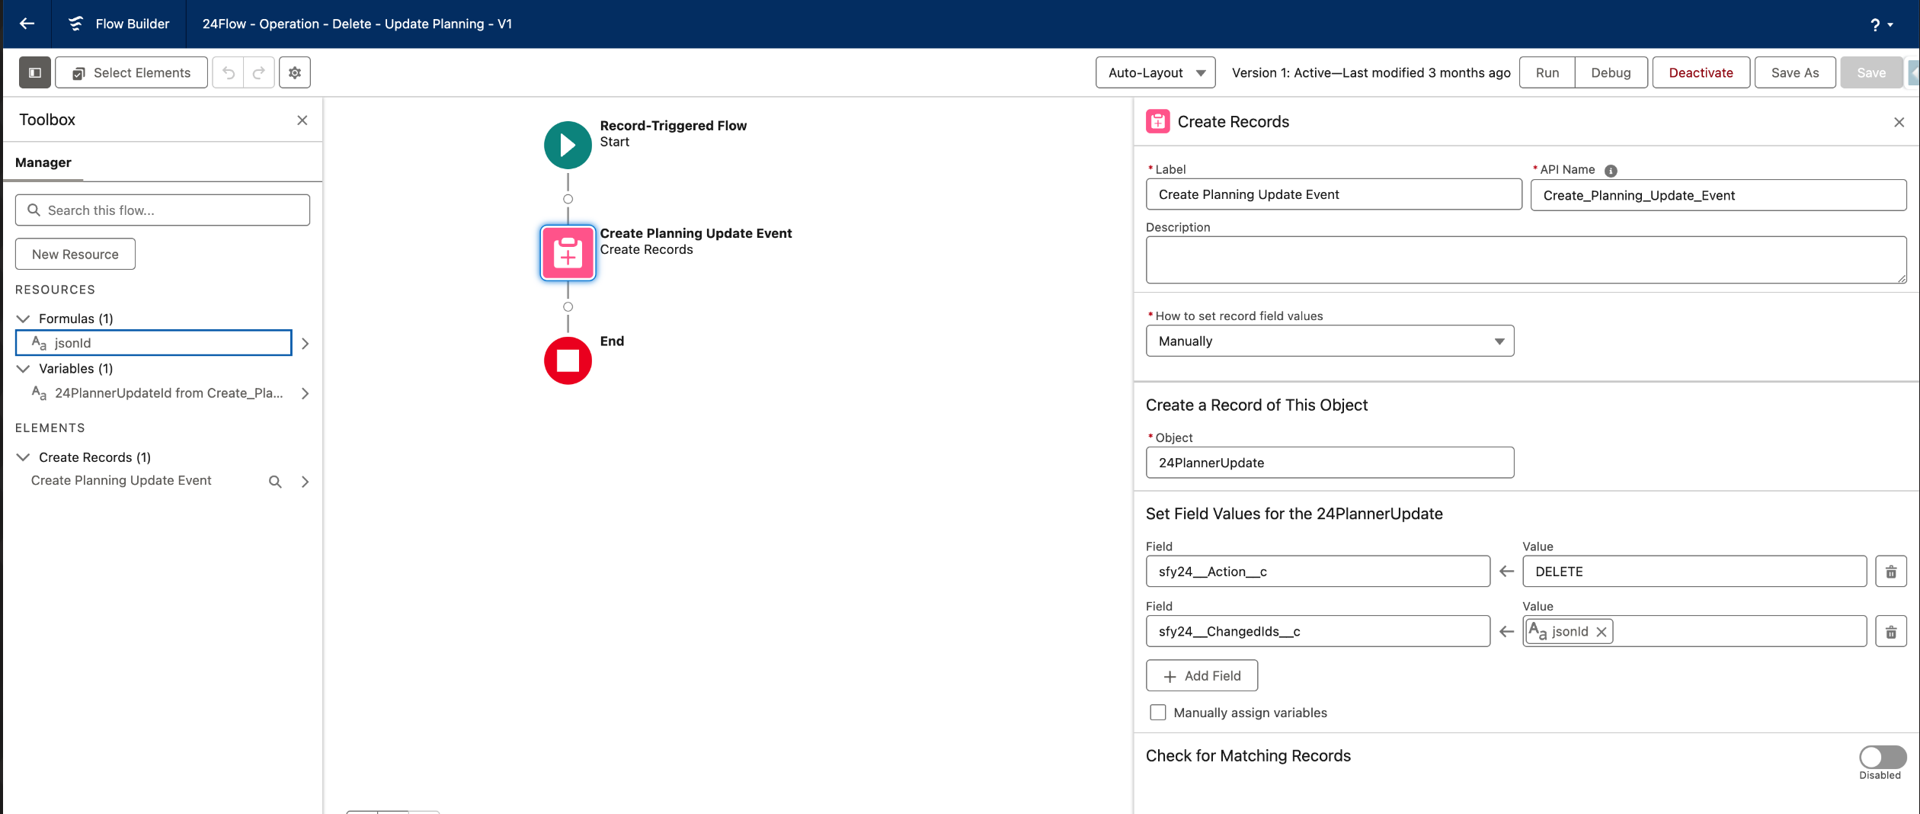
It is also possible to receive live updates in the planning board. In order to receive these live updates, you need to create a Flow that throws a platform event of the type 24PlannerUpdate. It has two fields: sfy24__Action__c that takes as value UPSERT and DELETE and sfy24__ChangedIds__c that is a text field with a comma separated list of the affected records {!$Record.Id}

-
SAVE BUTTON: You can configure 24Planning to either automatically save changes in the planning board, or only when the SAVE button is pressed. The behavior is defined in the View Presets (Custom Metadata Types). See the specific section on View Presets in this manual for more details.
-
UNPLANNED: When clicking on the UNPLANNED menu item, a right-hand-side pane will appear with unplanned events. These events can be dragged and dropped onto the canvas.
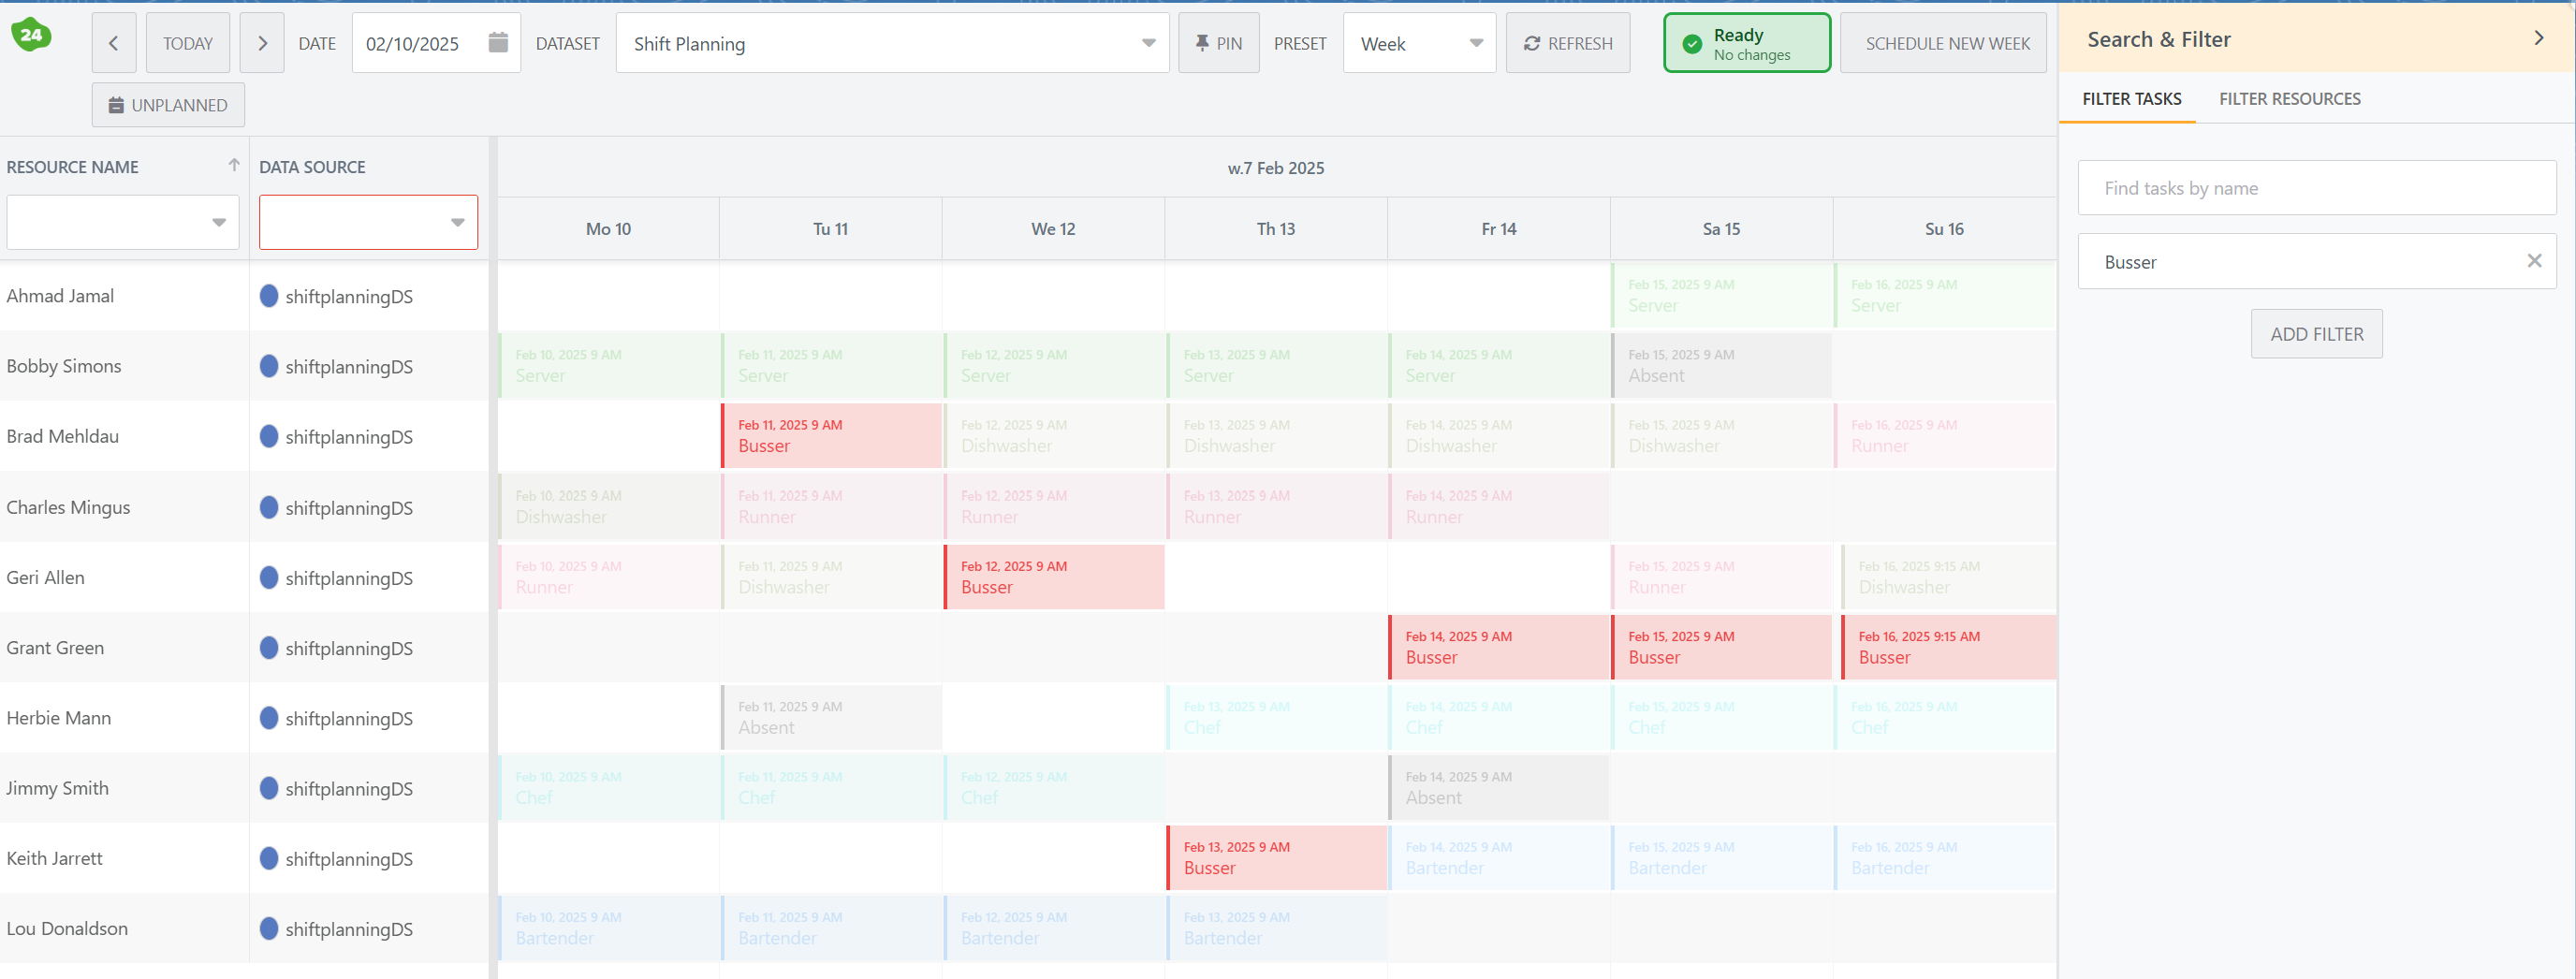
Search & Filter Sidebar
On the righthand side, there is a ‘Search and Filter’ side bar that allows you to search, filter or highlight events and resources. The screenshot below shows the highlight events in action.
Left pane
The left-hand-side menu allows you to filter respectively on resources and datasources. It is possible to add additional columns via the concept of Dynamic Fields.
The grouping and sorting (ordering) of the lefthand side info is set via Dynamic Fields. Please consult the Dynamic Fields section for more information.
In case you have configured a batch class, a button to invoke the batch class will be shown at the botton of the left pane.
Planning pane
Finally, there is the actual planning board where Events are shown. The order in which resources are shown are governed by the settings in the Dataset configuration (resource section) either alphabetically or first grouped by datasource and then alphabetically.
The events shown in the planner always have a start and end time as well as a name.
The following controls are supported:
-
Double-click to edit an event.
-
Right-click on an empty space to create a new event.
When you create a new event, the Start and End Time are prefilled. These default Start and End Time are determined as follows:
-
If a Workschedule is defined for the resource, the Start and End Time will align with the Workschedule.
-
If no Workschedule is defined for the resource, the Start and End Time will align with the Start Hour and End Hour as defined on the Dataset.
-
Drag & drop an event to assign it to another resource or time slot.
-
Right-click on an event to edit, delete or view the event.
-
Click on the boarder of the box of an event and drag to extend the duration of the event.
-
Ctrl - Multi-select drag & drop: use Control to select multiple events and shift them all at once to different time slot.
Note: please make sure that your Salesforce time zone setting (accessible via Setup > Users) is the same as your browser time zone setting; if not, you will have difficulties to interpret the Events in the Planning Board.
Unplanned Events Pane
-
Right-click: Right-click to edit or view an unplanned event.
Note that if you update your configuration (e.g. update the Dataset or Datasource), you need to refresh your browser to make these changes visible in the Planning Board.